1. Print Out
I'm printing out the templates in a light blue.
Several images can be put next to each other.
 2. Drawing Details
On the printed templates I am drawing the details of each figure.
First with a pencil, then with a black or red pen.
3. Scanning & Colour Erasing
The drawing is scanned and the white parts are
marked by a colour mask and are erased.
I use different layers:
Layer 1 with the original template,
layer 2 for the scan with hand-drawn details
I can adjust layer 2 according to the blue
outline onto the template of layer 1.
Now the blue parts on layer 2 can be erased.
 Finally the different grey and black shaded
 pixels are all coloured to 100% black.
4. Colouring
The fillings are done on a third layer.
5. Shading
Same about shading:
new layer with a certain translucency.
I usually use different layers
for shading on black and other
colours.
(e.g. dark blue shade on black /
black lucent shade on purple /
light blue shade on white)
6. Scaling Down
Before uploading the picture to this
blog I resize it to approx. 10%


 1. Scanning
I scan the original artwork, I'd like to create an template from.
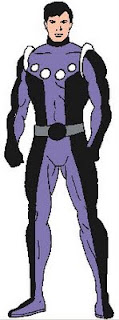
In this example it's Element Lad by Ron Frenz.
1. Scanning
I scan the original artwork, I'd like to create an template from.
In this example it's Element Lad by Ron Frenz.
 2. Change of Colours
First the scanned picture is turned into a grey-scaled picture.
Then back into a RGB- or CMYK-mode.
The grey colours are turned into blue and the brightness is encreased.
Finally this version is printed out.
2. Change of Colours
First the scanned picture is turned into a grey-scaled picture.
Then back into a RGB- or CMYK-mode.
The grey colours are turned into blue and the brightness is encreased.
Finally this version is printed out.
 3. Drawing
On the print-out I draw directly the outline of the template with black.
3. Drawing
On the print-out I draw directly the outline of the template with black.
 4. Second Scanning
The print-out with the black outline is scanned and the blue shaded pixels are erased.
The different dark grey/black pixels are all coloured to one 100% black.
4. Second Scanning
The print-out with the black outline is scanned and the blue shaded pixels are erased.
The different dark grey/black pixels are all coloured to one 100% black.

 2. Drawing Details
 Finally the different grey and black shaded